Have a Question?
Configuring PuTTY for use with Alicat instruments
PuTTY is a commonly-used serial terminal program that you can use to communicate with your Alicat over RS-232 or RS-485. The instructions below explain how to configure PuTTY for optimal communications with your Alicat instrument.
Skip ahead: Configuring PuTTY to connect your Alicat to a Raspberry Pi
Configuring PuTTY
- Download PuTTY from putty.org and run the installer.
- Open PuTTY; it will start on the Configuration screen shown below.
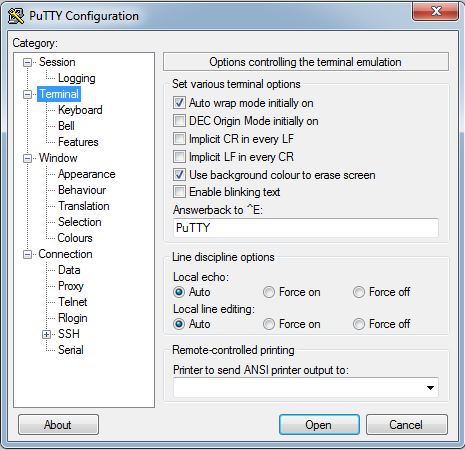
Default terminal settings in PuTTY before configuration for use with Alicat instruments
- Click on the Terminal category. The changes we make here will cause PuTTY to act like a normal serial terminal, such that pressing enter will move the cursor to the next line and both what you type and what gets returned stay on the screen.
- Check the box that says “Implicit LF in every CR.”
- Select the “Force on” radio button in the “Local echo” section.
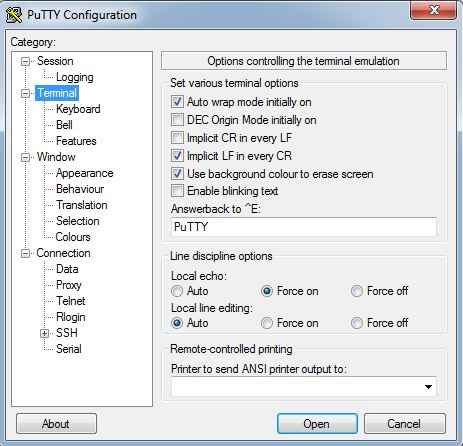
Terminal settings in PuTTY after configuration for use as a serial terminal for Alicat instruments
- Click on the Connection category and then the Serial subcategory.
- Set the Speed (baud) to 19200.
- Set the Data bits to 8.
- Set the Stop bits to 1
- Ensure that “None” is selected for both Parity and Flow control.
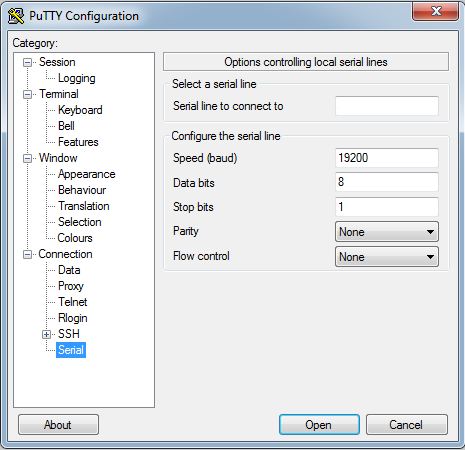
Serial line settings in PuTTY after configuration for use with Alicat instruments
- Click on the Session category.
- Select the “Serial” radio button in the “Connection type” section.
- Check that the selected COM port and baud rate (Speed) are correct.
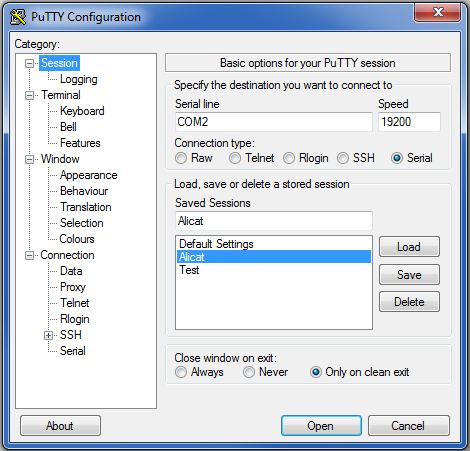
Session COM port and baud rate settings in PuTTY after configuration for use with Alicat instruments
- Save your settings so they can be recalled again later.
Continue reading if you are using a Raspberry Pi.
Configuring PuTTY for a Raspberry Pi
- Install PuTTY to run on your Raspberry Pi following these instructions
- Ensure that the serial port is enabled in your Raspberry Pi configuration settings
- Configure PuTTY using the same settings as above, but use one of the following for the serial line:
- If connecting through a USB port, use ‘/dev/ttyUSB0’ (most common)
- If connecting through a serial DB9, use ‘/dev/ttyS0’